


|
LEATHER TOOLSThe Overview
Leather working - a craft that turns into an art. And it's always fun to do! I have done this craft, strictly as a hobby. As a hobby you only need a few leather tools. But if the hobby turns into an addiction, I mean, profession, you will have an abundance of leather tools to select from. This craft can be done with as little as 2 leather tools - a knife and leather needle. That’s all you need to make a pair of moccasins. However a thimble, a mallet and leather punch would make it easier. Or a hand punch would make it easier. And then of coarse you can use a rotary head adjustable punch. The leather tool selection goes on and on. But if your like me, that’s a huge part of a hobby. "Tooling". Finding that exact tool for the exact purpose is very satisfying. In the process your work will evolve into art.
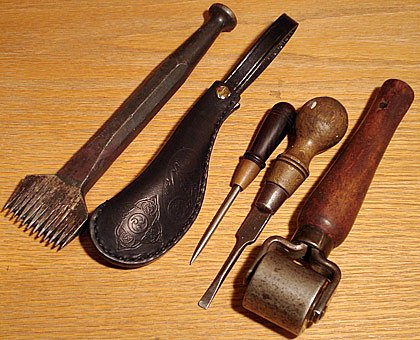
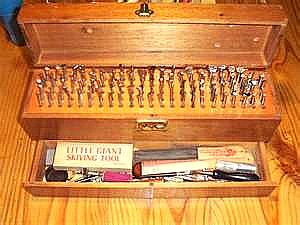
Where to start?I always say, a couple of books and a video. You already started out right by coming to Brothers-Handmade! And that puts you 1/100th of the way there! The first thing you need is the same as in all Crafts/Arts. A Work Area. In the work area, a bench and a cutting board that is large enough for your piece and small enough to turn. The bench should be sturdy and big enough to accommodate your work and tools. That won’t take up too much room, as there are only 7 basic tools, along with a maul, a sponge and a bowl of water, tracing film and a stylus that you'll need. For the purpose of this article we will discuss the carving arts used for making belts, wallets, purses, dog collars, brief cases, and Barbeque seats. Of course there are a whole lot more then this, but this will do for now. The Leather Tools
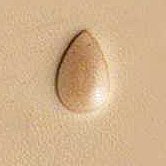
The sponge and water are used to "case" (dampen) the leather. The leather must be damp in order to mark it and to "work" it. It is important that the leather not be soaked. Just damp. If you get it to wet, it will get mushy and won’t "work" well. If you get it too wet, don’t panic, let it dry slowly. Don’t use heat!!! Just let it sit. If you’re in a hurry, a fan is all that is required. Use glass or plastic to hold the water. Metal containers may stain the leather. The Stencil and Stylus Used to set your design on the leather after you case the leather. The stencil is placed on the damp leather and just a little pressure is used to trace with the styles. The leather will stay marked, even after it dries. This is the start of your project, so take your time and get it right. There are probably some leather artists who can free hand this part. To me it makes more sense to draw it out on paper or tracing film first, and then trace it onto the leather. A whole lot less chance of mistakes doing it this way. So lets start with a basic floral design as this is a popular design and there are plenty to choose from. So now we are at the point that you successfully applied the design to the leather and you removed the stencil. Don’t forget to case (dampen) the leather. It’s now time to make the cut. The Swivel Knife
Here is a good tip for the beginner. The first time you use a swivel knife, try it on a piece of scrap leather. Practice a little and get used to it. This tool was engineered very intelligently. Simply place your thumb and middle finger around the barrel of the knife and your pointer finger in the saddle of the knife. With the pointer finger you adjust the pressure and you turn the blade with the thumb and middle finger. Practice makes perfect. It’s important to remember. You can always cut twice, but you can’t uncut. Don’t press real hard. If the swivel knife is leaned forward it will cut deeper. If the swivel knife is leaned back it will cut in a little less. Always pull or draw toward yourself. Its better to make short cuts and have those cuts be precise. Turn the piece to accommodate the cut. A longer blade works well for long lines and more open sweeping curves. A shorter blade works well for detailed cuts and short, tight turns. Be careful with the short blade, as it doesn’t take much to cut to deep. Less pressure is better!!! The swivel knife is the first and the last tool to be used.In the end, it can be used for the decorative cuts. These are cuts made to bring out definition. It is also the point you might ruin the piece by over doing it!!! The Beveler
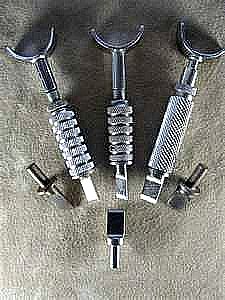
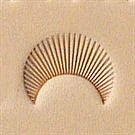
This is the tool that starts the 3D effect. While using the beveler, don’t be afraid to lean it front and back. This will give it different effects. For best results, tap and move along on one side of the cut only. Try not to leave creases. Overlap as you move along. And remember most of the time you can come back to add the tools effect, but it is very difficult to take the effect away. There are many sizes of beveling tools, to start use a middle size. The large ones are great for slight curves and long straight lines but don’t work well with tight intricate work. The Pear Shader
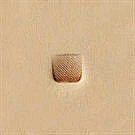
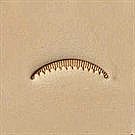
This tool is what gives volume to your work. As just one small example, when making a flower, use the pear shader on the flower peddles. You will see what I mean by volume. The pear shader can be moved forward and backward and side to side to give a longer and wider shaded area. The Camouflage and Veiner Tools
These are used in flowers and plant type work. You can make flower pedals stand out with the camouflage tool and then use the veiner for background and stem work. As with most of the leather tools the camouflage tool and the veiner tool have a number of uses, but working up a flower design is where they are used the most.
The Seeder
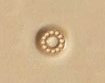
This tool is used in flower work. It can also be used to make eyes on animal work. There are many sizes of seeders; something in the middle is an excellent place to start. If you use a kit design, and it calls for a larger one then you have, no problem. Set more seeds. If it calls for smaller, use less. Also take your time and make sure the seeds are touching. If there is a space between them the eye will see that space, even if you have 100 seeds. The Background Tool
The background tool is what brings the 3D effect up and out. You can also use a carving stamp or a matting tool. Once you start with one, finish with it. After you do this for a while, the tool will become part of your hand and you will be able to move along pretty fast. In the beginning, go slower and don’t make mistakes. It’s easy to do it wrong and hard to do right. But once you do it right, it will become habit and from that point you will build speed. A Couple of Tips 1) The maul; Don’t use metal. Use Wood, Leather, or Polly. Also not very heavy! 2) Start with a leather KIT. The directions will show the placement of the tools on the piece. That will give you an idea what to do in future work. 3) Don’t forget to CASE the leather as you work. 4) When purchasing your first kit, buy a piece of scrap leather. And test the tools! 5) Try angling the tools to see the effect. 6) Start out correctly. Take your time. Leather work is very relaxing when it’s a hobby. A Couple of Companies Tandy Leather. In the early 70’s I cut and worked my first kit. It was a Tandy leather kit and also the tools were Tandy tools. Everything still works including the Barbeque seat. I take it camping and still get Ooo's and Ahhh's when other campers see it! Barry King Tools. These are stainless steel. Stainless extends the life of the tools being used frequently. They have a large selection of tools and some very nice specialty boarder stamps. Barry has a beautiful round and tapered mauls.They have a lifetime guarantee for all tools, except normal wear items. Montana Leather Co. This company has been around since 1908! They have a large selection of tools, plenty of kits, and supplies. And if your interests lean toward other leather crafts, they have those also. Nice selection of hides for both tooling arts and clothing arts. Hackbarth Steel Leather Tool. Ok, so now you are addicted to leather carving and your tool inventory is getting quite impressive. Now its time to check out Hackbarth. These are hand ground, high-end tools. Made from 1018 steel and stainless steel. Upon investigating this article, my source told me about Hackbarth. She said she loved their boarder tools and specialty tools. They are a tad expensive, but if they help you turn your work into art, I would say they would be worth it. I hope you enjoy this craft art. It is fun! "Come See What Your Neighbors Are Making" I’ll bet a lot of them tool leather. |

Appreciate when you ...
What's New on BH?
Blog: Old Fourth Ward - Atlanta, GA
Feature: Potter - Julie Jones